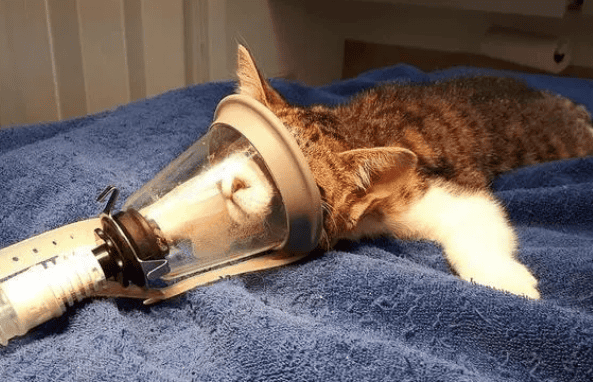
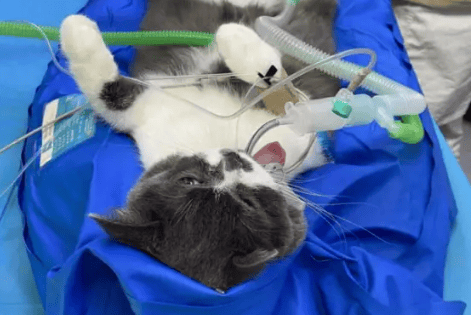
Introduction
The significance of tracheal intubation
· Keep the airway open when the animal is unconscious
· Prevent the inhalation of other substances (blood, saliva, stomach Contents, etc.)
·Allows the delivery of oxygen and anesthetic gas
·Closes the anesthesia circuit and isolates air pollution
Uses
· Supplement oxygen
· Perform manual ventilation for sick animals with respiratory failure
· Use respiratory anesthetics to maintain anesthesia
· Prevent oropharyngeal surgery, Aspiration during dental surgery or gastric lavage
· Use in situations where the risk of vomiting or reflux is high, such as esophageal obstruction, intestinal obstruction, and unfasted animals
Advantages
· As long as the operation is correct, it is safe
· Simple and easy to use, the required equipment is generally prepared in the clinic
· Good effect< /p>
· Beautiful price
Disadvantages
· Risk of laryngospasm
Technical issues
· Harm to the larynx or trachea There is a small risk of injury
· If the animal has difficulty opening its mouth or there is a mass in the throat/larynx, it may not be possible to intubate
Alternative techniques
· Nasal cannula for oxygen
· Mask oxygen supply
· Supraglottic airway device: Cat-specific intubation V-gel
· Tracheotomy (tracheotomy in cats) The prognosis of the operation is not very ideal)
Time requirements
Preparation
· In most cases, anesthesia is required before intubation (unless the state of the animal Very depressed)
Time taken
· 1-2 minutes
Decision-making
Risk assessment
· If expected If the animal has difficulty opening its mouth or having difficulty intubating, it should be prepared to perform tracheotomy in advance
· However, compared with dogs, tracheotomy is less effective in cats
· If you encounter For very narrow larynx, use a small intratracheal connector to connect the canine catheter, and then connect it to a T-tube and insert it into the trachea
Required conditions
Required materials
p>Minimum Equipment Requirements
· Appropriately sized rubber/silicone endotracheal tube (depending on cat size).
· Generally, a cannula with an inner diameter of 3-6 mm is suitable.
·The length of the intubation tube should reach the midpoint from the front teeth to the throat-chest entrance. Select the shortest catheter that can be properly secured:
1. Reduce respiratory workload
2. Reduce respiratory dead space
3. Reduce the risk of endobronchial intubation
· Non-helical wire-reinforced endotracheal tubes can be cut to length as needed. If cutting, make sure the connector is firmly attached to the endotracheal tube again to prevent it from falling out.
· Select the largest catheter that can be placed without strain: catheter stenosis increases resistance to gas flow, thereby increasing respiratory workload.
· It is recommended to prepare multiple sizes of catheters for each animal.
Ideal Equipment Requirements
· Laryngoscope with light source
· Opening device
· If a cuffed endotracheal tube is used, maintain Cuff inflation (if the cuff is not part of the catheter itself)
Minimum consumable requirements
· Water-soluble lubricant or local anesthetic gel
· For the catheter Cuff-inflated syringe (2.5-5ml)
· Gauze tape to secure the catheter
· Have a mouth/throat/throat cleanser ready before intubation if needed Cotton swab
Ideal consumable requirements
· Throat local anesthetic spray
· Lidocaine hydrochloride syringe (with catheter)
· Spray/apply directly to the larynx and vocal cords, please pay attention to the amount used (if too much local anesthetic is used, there may be a risk of aspiration and potential toxicity due to additive effects).
Preparation
Preoperative medication
Atropine or preferably glycopyrronium bromide (which has less cardiovascular effects) can be used as a preoperative anesthetic. part (to reduce the incidence of vagus nerve-induced arrhythmias during induction of anesthesia).
! Because atropine increases the viscosity of respiratory secretions, atropine is not recommended as a routine pre-anesthetic medication.
! Do not give atropine or glycopyrrolate while using alpha-2 adrenoceptor agonists.
Other preparations
· Make sure the catheter is clean and the lumen is unobstructed
· If using a cuffed endotracheal tube, inflate the cuff before insertion to ensure No leaks, keep inflating for more than 10 minutes, then deflate.
·Tie a gauze strip or bandage around the end of the catheter where it enters the mouth
! Do not tie the tape too tightly to avoid compressing the lumen.
Animal restraint
· General anesthesia is required unless the animal is unconscious due to a disease process.
Technical methods
Operational methods
Step 1 Induction of anesthesia
· Induction of anesthesia (usually intravenous injection of drugs until effective)< /p>
Step 2 Position the animal
· Place the animal in the lateral or chest recumbent position: if there is a risk of reflux, place the animal in the chest recumbent position with the head elevated
p>
· The assistant grasps the roof of the mouth, raises the head and stretches the neck
· Grabs the tongue with the left hand (if right-handed) and pulls the tongue out of the mouth and down Depress your jaw to open your mouth
It may be helpful to place an oral mouth opener at this time.
Step 3 Present the larynx
· Place the tip of the laryngoscope at the base of the tongue and depress the epiglottis.
! Do not touch the epiglottis as this may cause laryngospasm.
· If there is no laryngoscope, you can gently pull the tongue and use the end of the endotracheal tube to depress the tongue to expose the larynx
· If the long soft palate blocks the view of the larynx, you can gently Gently push open the soft palate and release the epiglottis with the tip of a laryngoscope or endotracheal tube.
· Check whether the mouth, pharynx and larynx are clean and whether there is saliva, mucus and blood. If necessary, clean with suction or gauze before intubation.
· If necessary, spray local anesthetic on the epiglottis and wait 15 seconds for laryngospasm to reduce/local anesthetic to take effect before attempting intubation.

Core Steps
Step 1 Insert the catheter
< p>· Lubricate the front end of the catheter with water-soluble lubricant, paying attention to the amount· Wait for the throat to open during a deep breath. This may require some patience!
· Slowly and gently insert the twisting tube between the vocal cords
! Do not force the tube into the closed vocal cords as this may cause traumatic injury.
Step 2 Secure the catheter
· Secure the catheter behind the animal’s ear (use a slipknot)
Step 3 Check the catheter position
· Always ensure that the endotracheal tube is placed correctly in the trachea
· A properly placed tube is not palpable at the level of blood vessels in the neck
· If the animal is breathing, air should be felt Flow within the endotracheal tube
· If the animal is breathing and connected to the respiratory system, movement of the reservoir/rebreathing bag should be visible
· If the animal is breathing and connected to the respiratory system, Connected to the carbon dioxide detector, it should be able to display the exhaled carbon dioxide
Step 4: Inflate the cuff
· The cuff should be positioned above the epiglottis and inflated
· The cuff should be gently inflated until no more air leakage is detected when manually inflated with normal inflation volumes.
! Do not over-inflate the cuff.
· If the cuff needs to be inflated with >2ml of air, it means the catheter size is too small
· Cover or clamp the cuff’s inflation tube if necessary
Step 5 Connect the catheter
· Connect the catheter to the Ambu bag for artificial respiration, or to the anesthesia machine/oxygen cylinder for gas delivery.
! Remember to turn on the oxygen after connecting to the machine.
· Continuously monitor the airway during tube insertion. Suction may be needed to clear secretions that are blocking the tube.
· When moving the animal, always remember to disconnect and reconnect the tube to avoid trauma to the trachea.
End of anesthesia
Step 1 Extubation
· Untie the bandage fixed to the head
· If a cuff is used , deflate the cuff
! Extubation while the cuff is inflated may cause severe laryngeal trauma
· Since cats’ larynx is prone to spasm, care should be taken in time Removing the Tube
· When the ear prick reflex returns (usually before the swallowing reflex), the cat is usually ready to extubate
· Slowly and steadily at the end of the anesthetic procedure Pull out the catheter
· Check the catheter for damage and any blood, mucus, etc.
Postoperative care
Immediate care
Monitor
· Extend the head and neck until the animal is fully awake: Cats tend to flex their heads and neck after extubation.
Potential complications
· Incorrectly inserting the catheter into the esophagus instead of the trachea
· Inserting the catheter into the bronchus (wrong choice of a too long catheter)
· The catheter is twisted or blocked
· The catheter is too small or the cuff is not inflated, causing air leakage around the catheter
· Laryngeal trauma caused by laryngeal swelling after extubation
p>· Laryngospasm after extubation
· Inhalation of the catheter (usually occurs when the animal wakes up from anesthesia and the catheter is bitten off while still in the mouth)

Results
Complications
·Larynx or soft tissue injury
p>· Tracheal injury due to cuff over-inflation:
· Turning the animal without disconnecting it from the respiratory system increases this risk.
· Many animals will show some symptoms of tracheitis after intubation, such as coughing for several days
Reasons for treatment failure
· Failure to do so due to the following reasons Perform tracheal intubation: there is a mass blocking the larynx and laryngospasm

 扫一扫微信交流
发布评论